Views: 17901
VPN-connection at DMJX
VPN or Virtual Private Network is the term for a technique used to create a connection to systems and services that would otherwise only be available if you were on one of DMJX’s campuses. The purpose of the VPN is therefore to make it possible and secure to access systems and services even if you are outside DMJX’s addresses and the wireless network.
!!
A prerequisite for being able to log on to the VPN is that you have installed two-factor authentication. See the instructions – Click here >>
!!
Table of Contents
Installing the Cisco Secure client – Written guidance
Installation of Cisco Secure client – Video guide
Connect to VPN – Written instructions.
Connect to VPN – Video tutorial
Installation of “Cisco Secure client” – Written instructions
Installation of “Cisco Secure client” – Video guide
Connect to VPN – Written instructions.
Connect to VPN – Video tutorial.
VPN – Mac
There is a new VPN connection at DMJX, so if you have a computer that the school does NOT manage AND you have installed the “old” VPN, then the old client must be uninstalled.
If you do NOT have the old client on your mac, you can proceed directly to “Installing the Cisco Secure client” – otherwise you must first uninstall the old client.
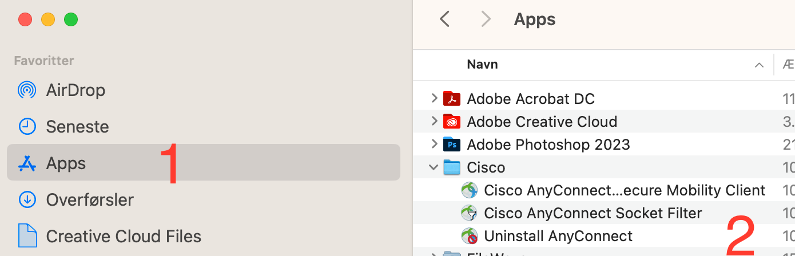
Uninstall the “old client”.
- Open “Apps” – You can find that from within your Finder.
- Then find the folder “Cisco” and then the program “Uninstall AnyConnect”
- Double-click on “Uninstall AnyConnect” and then uninstall the program.
Once the program is uninstalled, we need the new version on your computer.
Installing the Cisco Secure client – Written guidance
Your Mac must be at least version 13.x (Ventura). You can see which version your Mac has by clicking on the “apple” in the top left corner and then “About”
- Go to vpn.dmjx.dk
- In the dropdown menu you select ”06 – DMJX – Studerende”
- Then log in with your DMJX email (if you are outside the school’s network, you will be asked for two-factor authentication)
- Choose to download the file
- Open the file you downloaded.
- Double click on “Cisco-secure-client….”
- Follow the instructions in the installer.
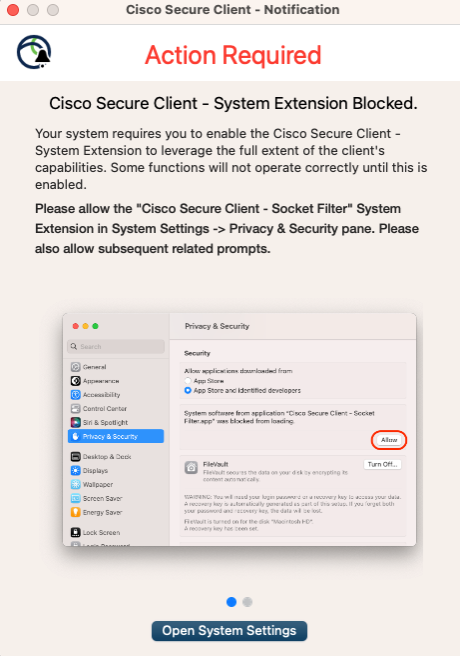
- When the package is almost installed, you will get a warning that a system extension is blocked.
- Select “Open System Settings”
- From here it may look a little different – depending on how up to date your mac is – the below is from mac version 13.xxx (Ventura))
- Click on “Allow”/”Tillad” (for older operating systems for Mac, you must first click on the padlock and unlock the computer – then click on “Allow”/”Tillad”)
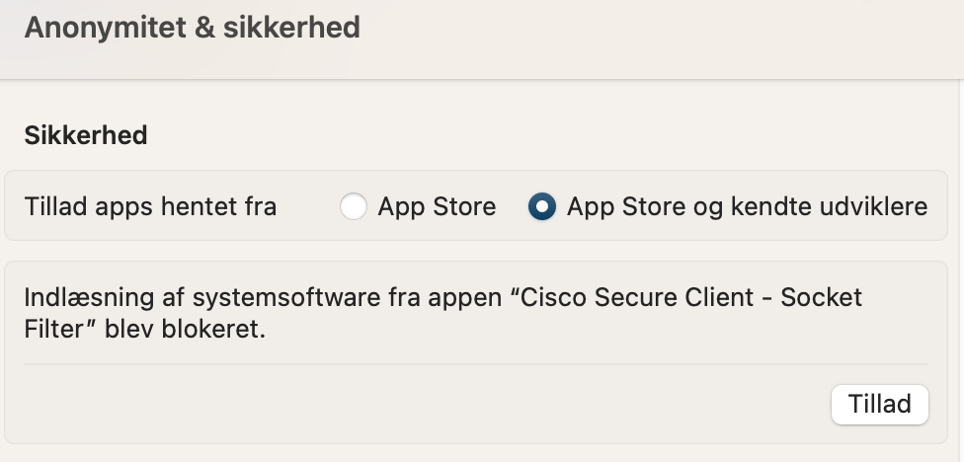
- You must then approve with your code (unless you have had to unlock via the padlock before).
- Now the window below will appear – select “Allow”/”Tillad”
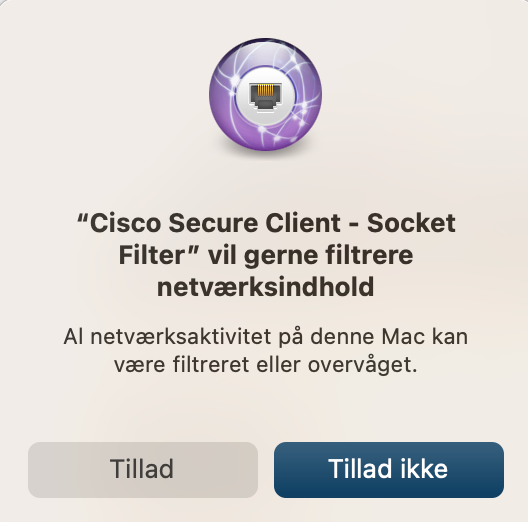
- You can now close the remaining windows and VPN connection is installed on your computer.
Installation of Cisco Secure client – Video guide
Connect to VPN – Written instructions.
- Open the “Cisco Secure Client” program.
- If this is the first time you are connecting, write this in the “white field”: vpn.dmjx.dk/stud
- Select “Connect”
- Log in with your DMJX email.
- Confirm login with two-factor authentication.
- You are now logged in to the VPN.
- When you have finished using the VPN connection, you should log out of the VPN. You do this by clicking on the VPN icon and selecting “Disconnect”.
Remember – it is only necessary to use a VPN connection when you are not on campus – and only for the services that are “behind our VPN” – e.g., the library’s services.
Connect to VPN – Video tutorial
VPN on a Windows PC
Installation of “Cisco Secure client” – Written instructions
- Go to vpn.dmjx.dk
- Select the group “06 DMJX Students” via the dropdown menu
- Log in with your DMJX email and password (if you are not on the school’s network, you will be asked for two-factor authentication)
- Select the “Download for Windows” button – the program is now downloaded.
- Double-click your downloaded file to install the program.
- Follow the installation instructions
- Finish by clicking Finish – the VPN connection is now installed.
Installation of “Cisco Secure client” – Video guide
Connect to VPN – Written instructions.
- Open the “Cisco Secure Client” program.
- If this is the first time you are connecting, write this in the “white field”: vpn.dmjx.dk/stud
- Select “Connect”
- Log in with your DMJX email.
- Verify login with two-factor authentication.
- You are now logged in to the VPN.
- When you have finished using the VPN connection, you should log out of the VPN. You do this by clicking on the VPN icon and selecting “Disconnect”.